Ingestion Authentication with API Key
Kloudfuse supports API key-based authentication for ingestion endpoints, letting you restrict which agents and sources are permitted to send telemetry data. To enable authentication for ingestion using API keys:
-
Configure in the UI (Kloudfuse 4.1+, recommended)
-
Configure in YAML (deprecated)
-
Configure your telemetry agents and sources to send the token
Configuration Methods
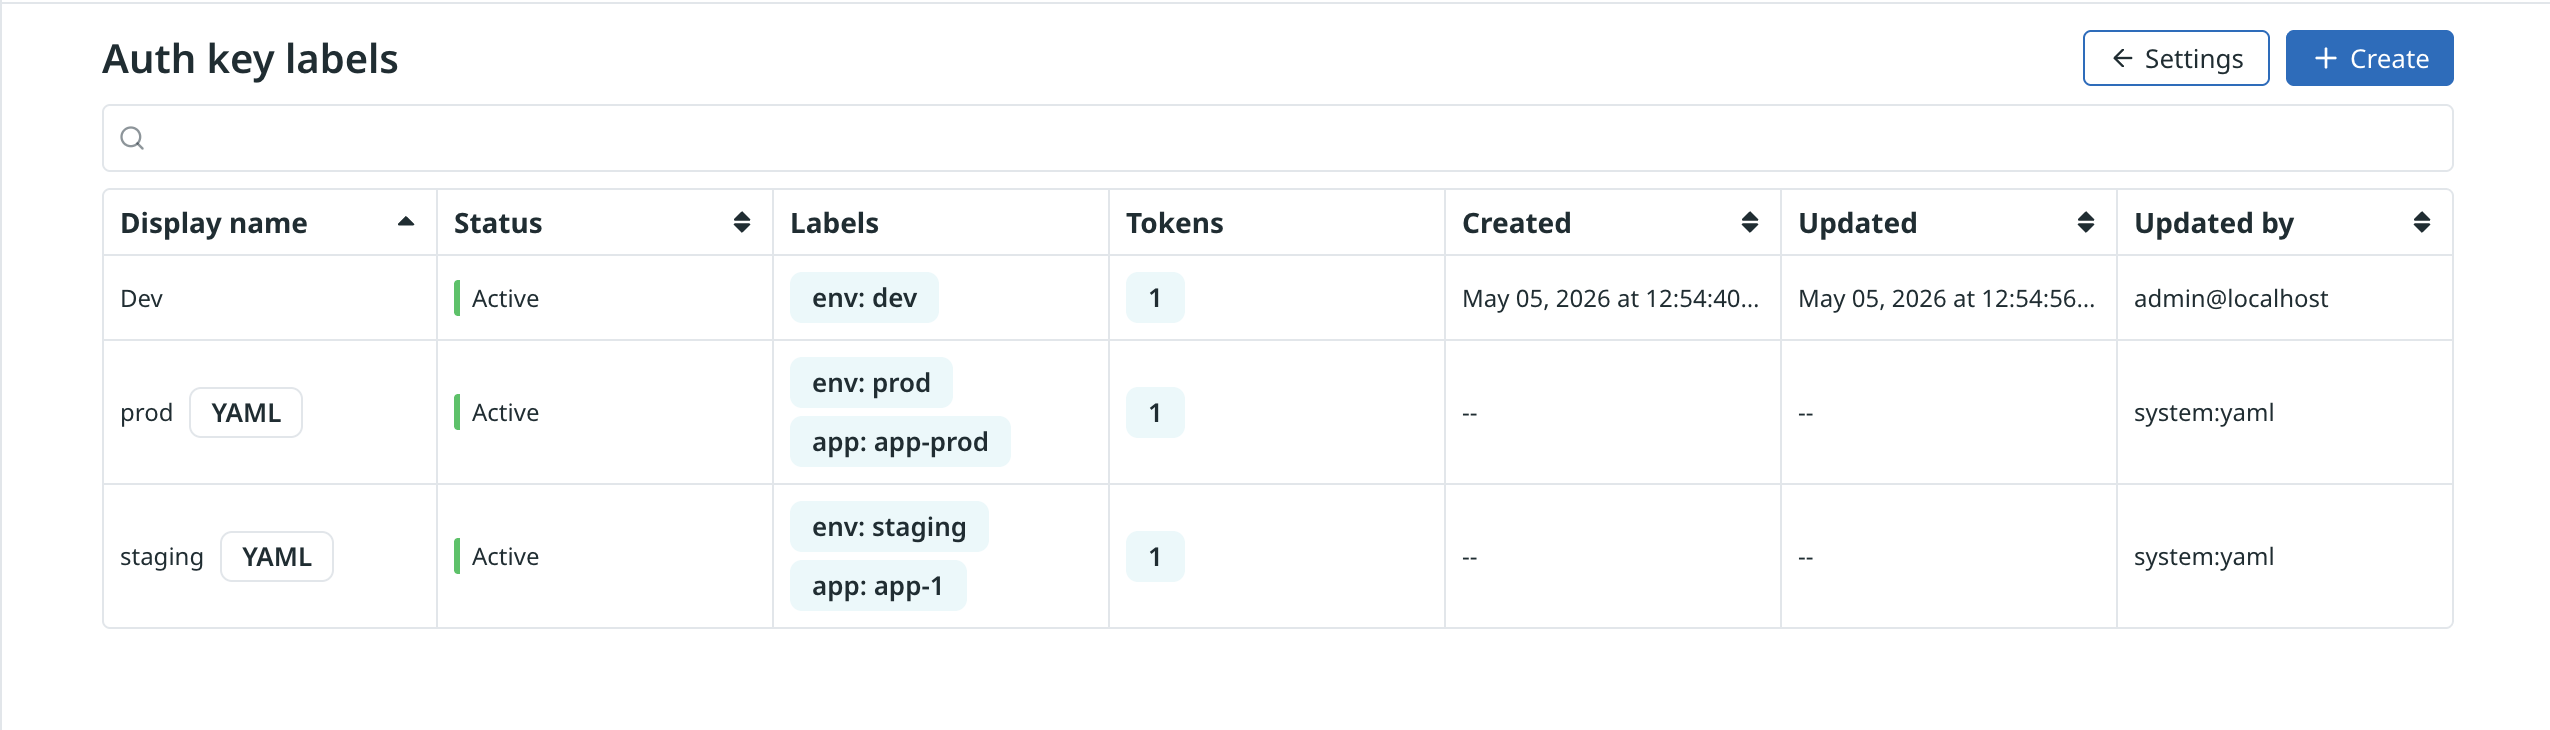
Starting with Kloudfuse 4.1, you can manage API keys and their optional additional labels directly from the Kloudfuse UI. Open Admin > Settings, then click Configure on the Auth key labels card. The UI is the recommended way to manage ingestion API keys going forward.
YAML-based configuration (Kubernetes secret kfuse-auth-ingest plus ingester.config.authKeyAdditionalLabels in custom_values.yaml) continues to work but is deprecated. YAML-sourced entries appear in the UI as read-only, badged with YAML. Edit, delete, and token-management actions are disabled for these rows.
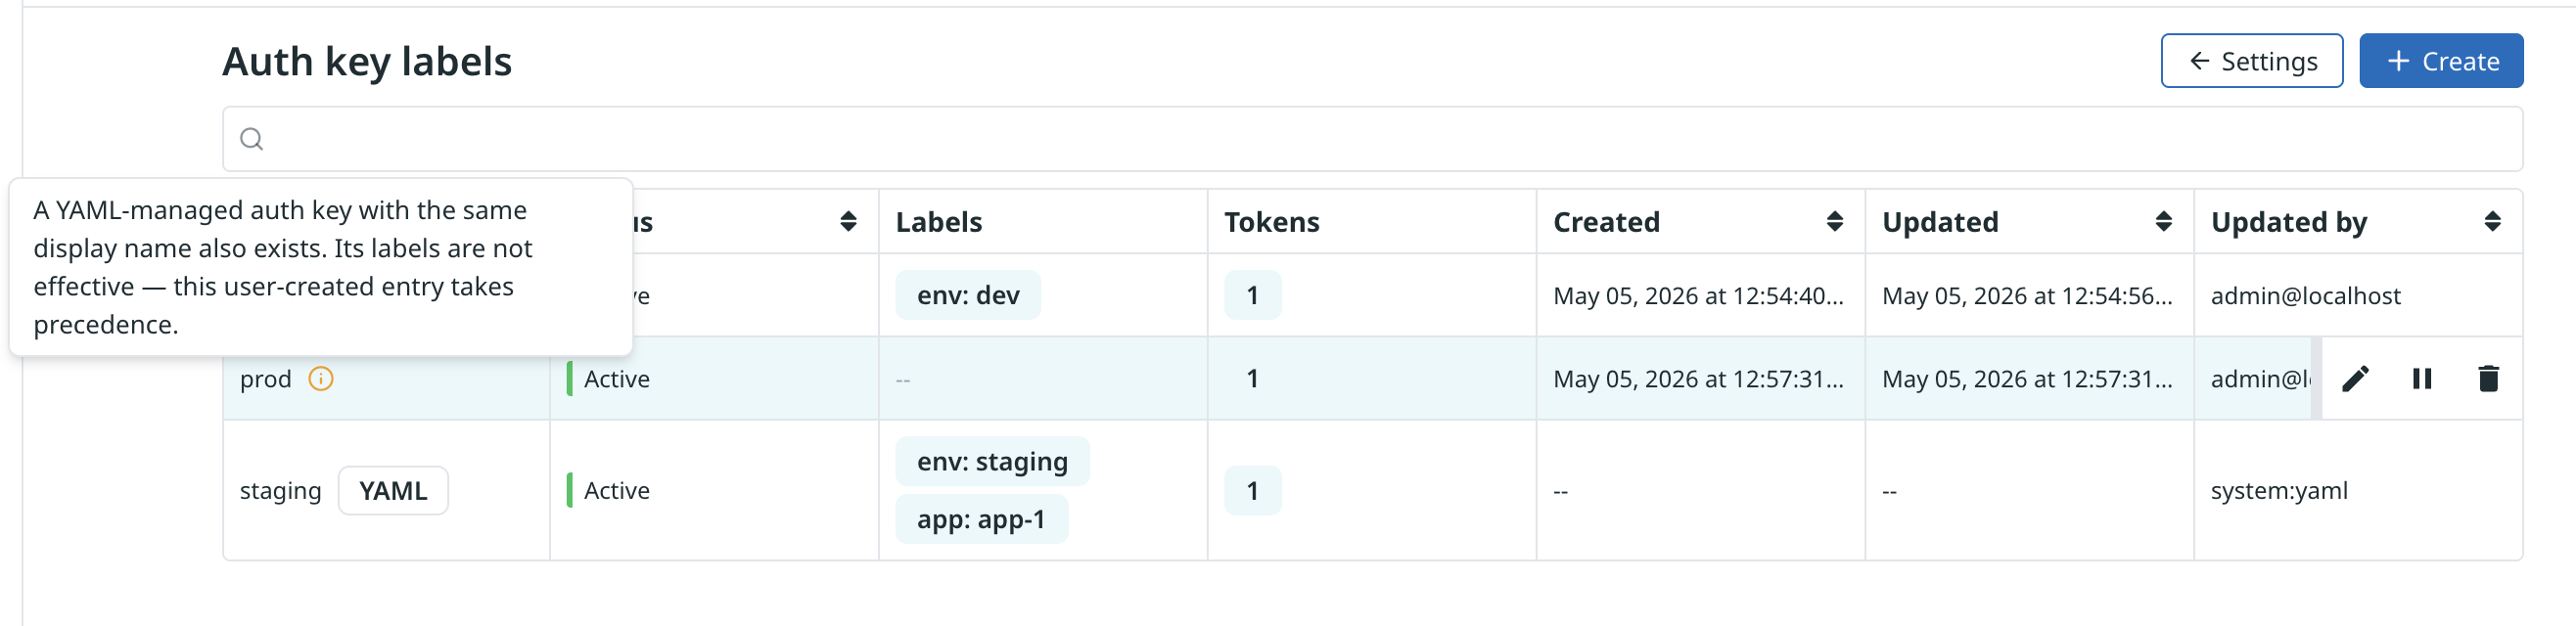
| UI-managed entries always take precedence over YAML. The ingester resolves auth keys against the UI snapshot first and falls back to YAML only when no UI entry matches. When a UI-managed entry and a YAML entry share the same display name, the UI-managed entry wins — the shadowed YAML entry is hidden from the list view, and the surviving UI row is tagged with an info icon noting that the YAML labels for that display name are not effective. |
See Migrate YAML-managed Auth Keys to the UI for migration steps.
Configure in the UI (Recommended, 4.1+)
-
Sign in to Kloudfuse as an admin. From the left sidebar, open Admin > Settings, then click Configure on the Auth key labels card.

-
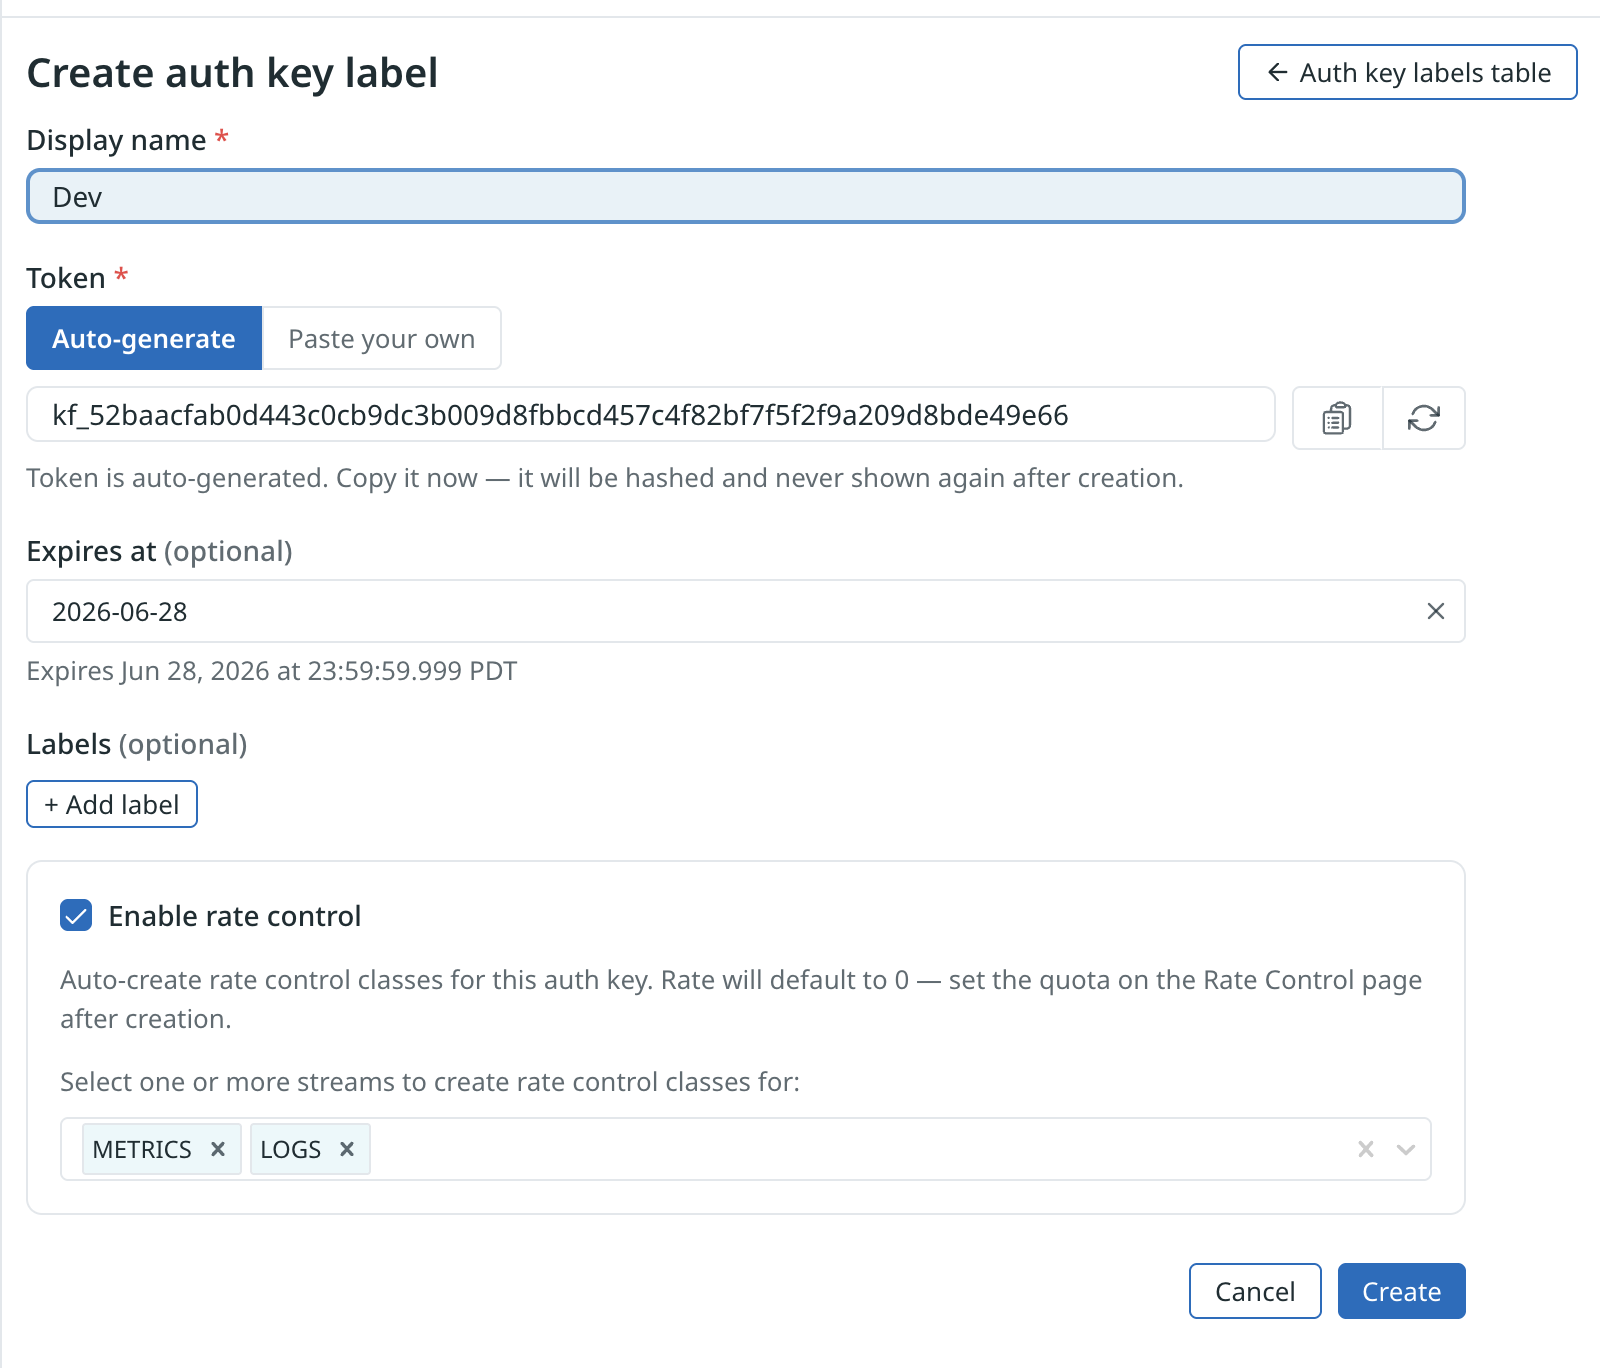
Click Create to open the Create auth key label form.
-
Enter a Display name. This is the human-readable identifier used to look up the key (equivalent to the secret key in the YAML approach, e.g.
authkey1). -
Set the Token (required):
-
Auto-generate (default) produces a token in the form
kf_<64hex>. -
Paste your own lets you supply an existing
AUTH_TOKENvalue — useful when migrating from YAML so you can reuse the token your agents already send. To generate a random token to paste in, see Generate the AUTH_TOKEN.Copy the token immediately. Kloudfuse stores only a SHA-256 hash of it, so the plaintext value is never shown again after the entry is created.
-
-
Optionally set an Expires at date. After that timestamp the token is rejected at lookup time. Leave blank for no expiry.
-
Optionally add one or more Labels (
name/valuepairs). Labels are attached to ingested data authenticated with this key — the UI equivalent ofingester.config.authKeyAdditionalLabels. Label names must be Prometheus-compatible. -
Optionally check Enable rate control to auto-create rate-control classes for this auth key. Select one or more signal streams (METRICS, LOGS, EVENTS, TRACES, RUM) — Kloudfuse creates a class per stream, each with a quota of
0. Set the actual quotas on the Rate control page after creation. See Manage Ingestion Rate Control for details. -
Click Create. The new entry is now active —
config-mgmt-servicepolls for changes and the ingester atomically swaps in the new snapshot, with no restart required. -
To add additional tokens later (for rotation) or to manage existing tokens, open the entry and switch to the Tokens tab.
-
Use the token in the
Kf-Api-Key(orauthorization) header of the agent or source you are configuring — see Configure Telemetry Agents and Sources.
Configure in YAML (Deprecated)
| The YAML-based configuration described below is deprecated as of 4.1. New deployments should use the UI. Existing deployments should follow the migration steps when convenient. |
The full YAML flow is:
Generate the AUTH_TOKEN
-
Generate an
AUTH_TOKEN, and store its value in a safe location. You use it repeatedly.AUTH_TOKEN=`cat /dev/urandom | env LC_ALL=C tr -dc 'a-zA-Z0-9' | fold -w 32 | head -n 1` -
Encode the
AUTH_TOKENusing Base64; this generates theAUTH_TOKEN_ENCODED.AUTH_TOKEN_ENCODED=`echo -n $AUTH_TOKEN | base64`
Create the kfuse-auth-ingest Secret
Use the base64-encoded value of the AUTH_TOKEN, AUTH_TOKEN_ENCODED, to create a kubernetes secret kfuse-auth-ingest:
apiVersion: v1
kind: Secret
metadata:
  name: kfuse-auth-ingest
type: Opaque
data:
authToken: <AUTH_TOKEN_ENCODED>Multiple Authorization Keys
You can configure multiple authorization tokens inside the secret. These tokens can contain any string value, and become a human-readable identifier to reference the AUTH_TOKEN.
Note that in the following example, we have both authkey1 and authkey2:
apiVersion: v1
kind: Secret
metadata:
  name: kfuse-auth-ingest
type: Opaque
data:
  authkey1: <AUTH_TOKEN_ENCODED>
authkey2: <AUTH_TOKEN_ENCODED2>Update the custom_values.yaml file to enable ingestion authentication:
global:
  authConfig:
enabled: trueAdditional Labels Based on AUTH_TOKEN
You can configure additional labels to attach to ingested time data, and base these labels on the auth token of the incoming payload.
To configure additional labels, add the following settings to the custom_values.yaml file. Note that Kloudfuse uses the same keys in the secret and in the ingester configuration:
ingester:
  config:
     authKeyAdditionalLabels:
        authkey1:
          - name: label1
            value: val1
          - name: label2
            value: val2
        authkey2:
          - name: label1
            value: val3
          - name: label4
value: val4Migrate YAML-managed Auth Keys to the UI
If you previously configured ingestion auth keys through the kfuse-auth-ingest Kubernetes secret and ingester.config.authKeyAdditionalLabels in custom_values.yaml, you can migrate to the UI after upgrading to 4.1. The migration is non-disruptive: YAML-sourced entries continue to authenticate ingest traffic until you remove them.
The migration relies on the precedence rule: as soon as you create a UI entry with the same display name as a YAML entry, the UI definition takes effect and the YAML entry is no longer used. This lets you cut over one key at a time without coordinating a YAML cleanup.
| If you have more than a handful of YAML entries, skip the per-entry manual recreation in step 2 and use the migration helper script instead. It reads the secret and ConfigMap directly and creates matching UI entries in one pass, reusing the existing tokens so no agent reconfiguration is needed. You still complete steps 1, 3, 4, and 5 manually. |
High-level migration steps:
-
Upgrade to 4.1 or later. In the UI, open Admin > Settings and click Configure on the Auth key labels card. YAML-sourced entries appear in the list with a
YAMLbadge and are read-only.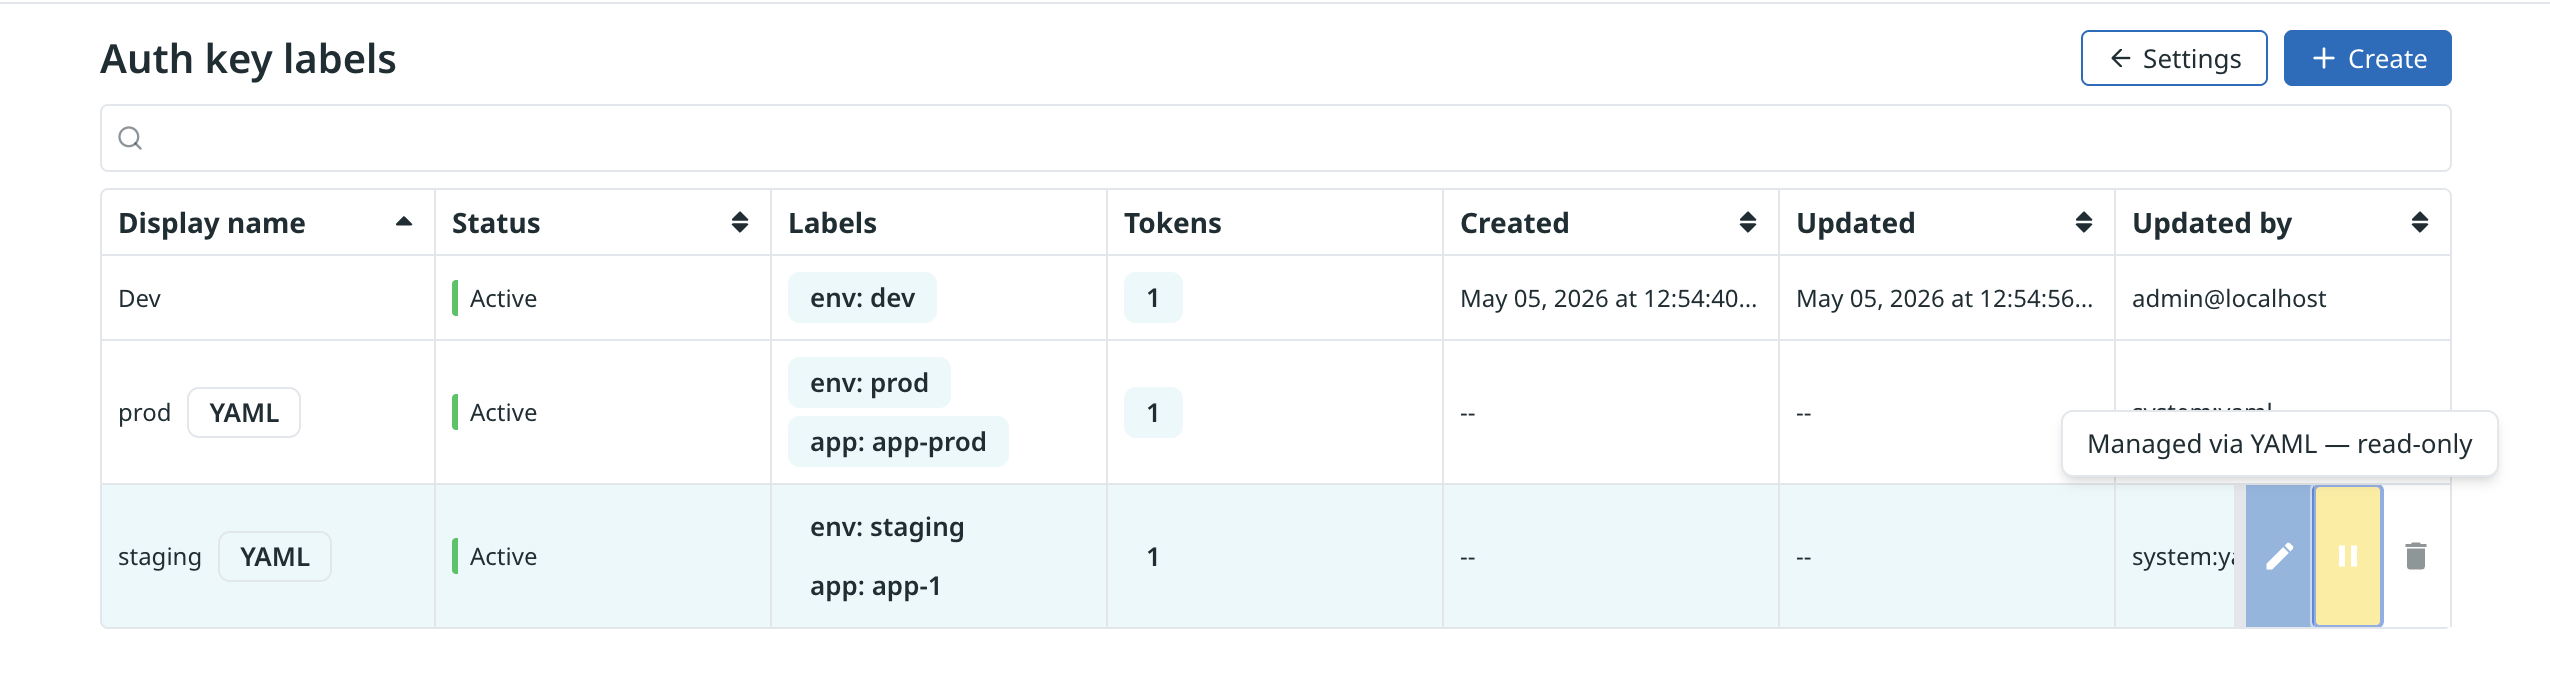
-
Recreate each YAML entry in the UI. You can do this manually (one-by-one) or use the migration helper script to automate it.
For the manual approach, for each YAML entry:
-
Use the same display name as the YAML key (e.g.
authkey1). When the display names match, the UI-managed entry shadows the YAML entry — Kloudfuse uses the UI definition for new traffic. -
Reuse the existing token value (paste it into the Tokens tab as a bring-your-own token) so agents that already authenticate against the YAML key continue to work without rotation.
-
Recreate any labels (
name/valuepairs) that were defined underauthKeyAdditionalLabelsfor that key.
-
-
Verify ingestion still succeeds and that the labels you expect are attached to the ingested data.
-
Delete the YAML configuration. Once every YAML entry has a corresponding UI entry and traffic is healthy:
-
Delete the Kubernetes secret:
kubectl delete secret kfuse-auth-ingest -n <namespace> -
Remove the
ingester.config.authKeyAdditionalLabelsblock (and the entirekfuse-auth-ingestsecret stanza, if you manage it via Helm) fromcustom_values.yaml, then re-apply Helm values.
-
-
Restart
config-mgmt-serviceso it stops surfacing the now-removed YAML entries:kubectl rollout restart deploy/config-mgmt-service -n <namespace>
Migration Helper Script
A bash helper script that automates step 2 (creating UI entries from the YAML data) is available as migrate-yaml-auth-keys.sh.
The script:
-
Reads tokens from the auth secret (default
kfuse-auth-ingest) by base64-decoding eachdata.<displayName>entry. -
Reads
authKeyAdditionalLabelsfrom the ingester ConfigMap (defaultingester, keyconfig.yaml), lowercasing display names to match the ingester’s Viper-loaded semantics. -
Joins each token with its matching label entry by display name, then calls
createAuthKeyLabelagainstconfig-mgmt-serviceto create a UI-managed entry that reuses the existing token — agents authenticated against the YAML key keep working without rotation. -
Skips display names that already have a UI-managed entry, so re-runs are idempotent.
The script only creates UI entries — it does not delete the Kubernetes secret or modify custom_values.yaml. Running it leaves your existing YAML config in place; the new UI entries simply shadow the YAML ones via the precedence rule. You must complete the cleanup manually (step 4 and step 5 above) after verifying ingestion is healthy. Until you do, the YAML data remains visible in the UI as read-only YAML-badged rows.
|
Prerequisites: kubectl, jq, python3 (with PyYAML), and a port-forward to config-mgmt-service:
kubectl port-forward -n <namespace> svc/config-mgmt-service 8080:8080Usage (defaults to namespace kfuse):
./migrate-yaml-auth-keys.sh [--dry-run]Pass -n <namespace> if your Kloudfuse install uses a different namespace. Run with --dry-run first to see exactly what would be created, then re-run without it to perform the migration. See --help for all options (custom secret/configmap names, port, admin email).
After the script completes successfully:
-
Verify ingestion is healthy (step 3 above).
-
Delete the Kubernetes secret and remove
authKeyAdditionalLabelsfromcustom_values.yaml(step 4 above). -
Restart
config-mgmt-serviceso it stops surfacing the now-removed YAML entries (step 5 above).
Configure Telemetry Agents and Sources
Once you have a token (from either the UI or YAML approach), configure your telemetry agents and sources to send it as the API key.
Prometheus Remote Write
-
Update the prometheus remote write configuration:
prometheus.yml:
  remote_write:
  - url: https://<customer>.kloudfuse.io/ingester/write
    authorization:
      credentials: <AUTH_TOKEN>
yaml -
When using the Prometheus operator, use the following configuration that contains the
AuthToken:remoteWrite: - authorization: credentials: key: <AUTH_TOKEN> (1) name: kf-auth-ingest (2) url: https://<customer>.kloudfuse.io/ingester/writeyaml1 <AUTH_TOKEN>: The key inside this secret that contains the encodedauthToken.2 kf-auth-ingest: The secret name.
Fluent Bit
-
In the HTTP plugin section of the fluent-bit configuration file, update or add the
headerfield using the newAUTH_TOKENvalue (from the previous step):[OUTPUT] Name http Match <match_pattern> Host <kfuse_ingress_ip> Port 443 TLS on URI /ingester/v1/fluent_bit header Kf-Api-Key <AUTH_TOKEN>yaml -
Use the Kubernetes Secret to set the
Kf-Api-Key.-
Create the secret:
apiVersion: v1
kind: Secret
metadata:
  name: <<secret-name>>
type: Opaque
data:
  AUTH_KEY_ENV: AUTH_TOKEN_ENCODED
yaml -
Update the fluent-bit helm using the
custom_values.yamlfile:env: - name: AUTH_KEY_ENV valueFrom: secretKeyRef: name: <<secret-name>> key: AUTH_KEY_ENV config: outputs: | [OUTPUT] Name http Header Kf-Api-Key ${AUTH_KEY_ENV} Match * Host dev.kloudfuse.io Port 443 TLS on URI /ingester/v1/fluent_bit Format {json|json_lines|json_stream|msgpack}yaml
-
Fluentd
-
In the HTTP plugin section of the Fluentd configuration file, update or add the
headersfield using the newKf_Api-KeyandAUTH_TOKENvalue (from the previous step):
<match *> # Match everything
  @type http
  endpoint http://<KFUSE_INGESTER_IP>:80/ingester/v1/fluentd
  headers {"Kf-Api-Key" : "<AUTH_TOKEN>"}
  ...
</match>Filebeat
In the output section, include the api_key field to update or add a filebeat configuration.
output.elasticsearch:
  hosts: ["http://<ingress-ip>:80/ingester/api/v1/filebeat"]
api_key: "<AUTH_TOKEN>"OLTP Collector for Metrics, Logs, and Traces
In the exporters section, include the api_key field using AUTH_TOKEN value to update or add an OLTP configuration.
exporters:
  otlphttp:
    endpoint: https://<ingress-address>/ingester/otlp/metrics
    traces_endpoint: https://<ingress-address>/ingester/otlp/traces
    headers:
kf-api-key: <AUTH_TOKEN>DataDog agent
Include the api_key field using AUTH_TOKEN value to update or add a DataDog configuration.
datadog:
apiKey: <AUTH_TOKEN>AWS CloudWatch Metrics and Logs (Kinesis)
When configuring kinesis firehose data stream to send logs or metrics from Cloudwatch, use the AUTH_TOKEN value as the access token.
If the firehose data stream is already operational, update it to use the AUTH_TOKEN value as an access token.
AWS Eventbridge Events
When AWS EventBridge Integration to ingest to Kloudfuse, use AUTH_TOKEN as the value for the Kf-Api-Key.
Heroku Logs
For Heroku logs authentication, create the auth key entry in the UI (Configure in the UI) or via YAML (Create the kfuse-auth-ingest secret).
Once the auth key is created, add the token as the kf-api-key parameter in the drain URL as described in Heroku Log Drain.
