Claude Desktop
Add the Kloudfuse MCP server to Claude Desktop as a custom connector. Claude walks the user through SSO login in a popup browser — no JSON editing.
Prerequisite
An operator has already enabled the connector on your Kloudfuse cluster by following Enable on the Cluster. If you haven’t done that step, Claude’s "Add" button will fail with a start_error banner.
Install the Connector
-
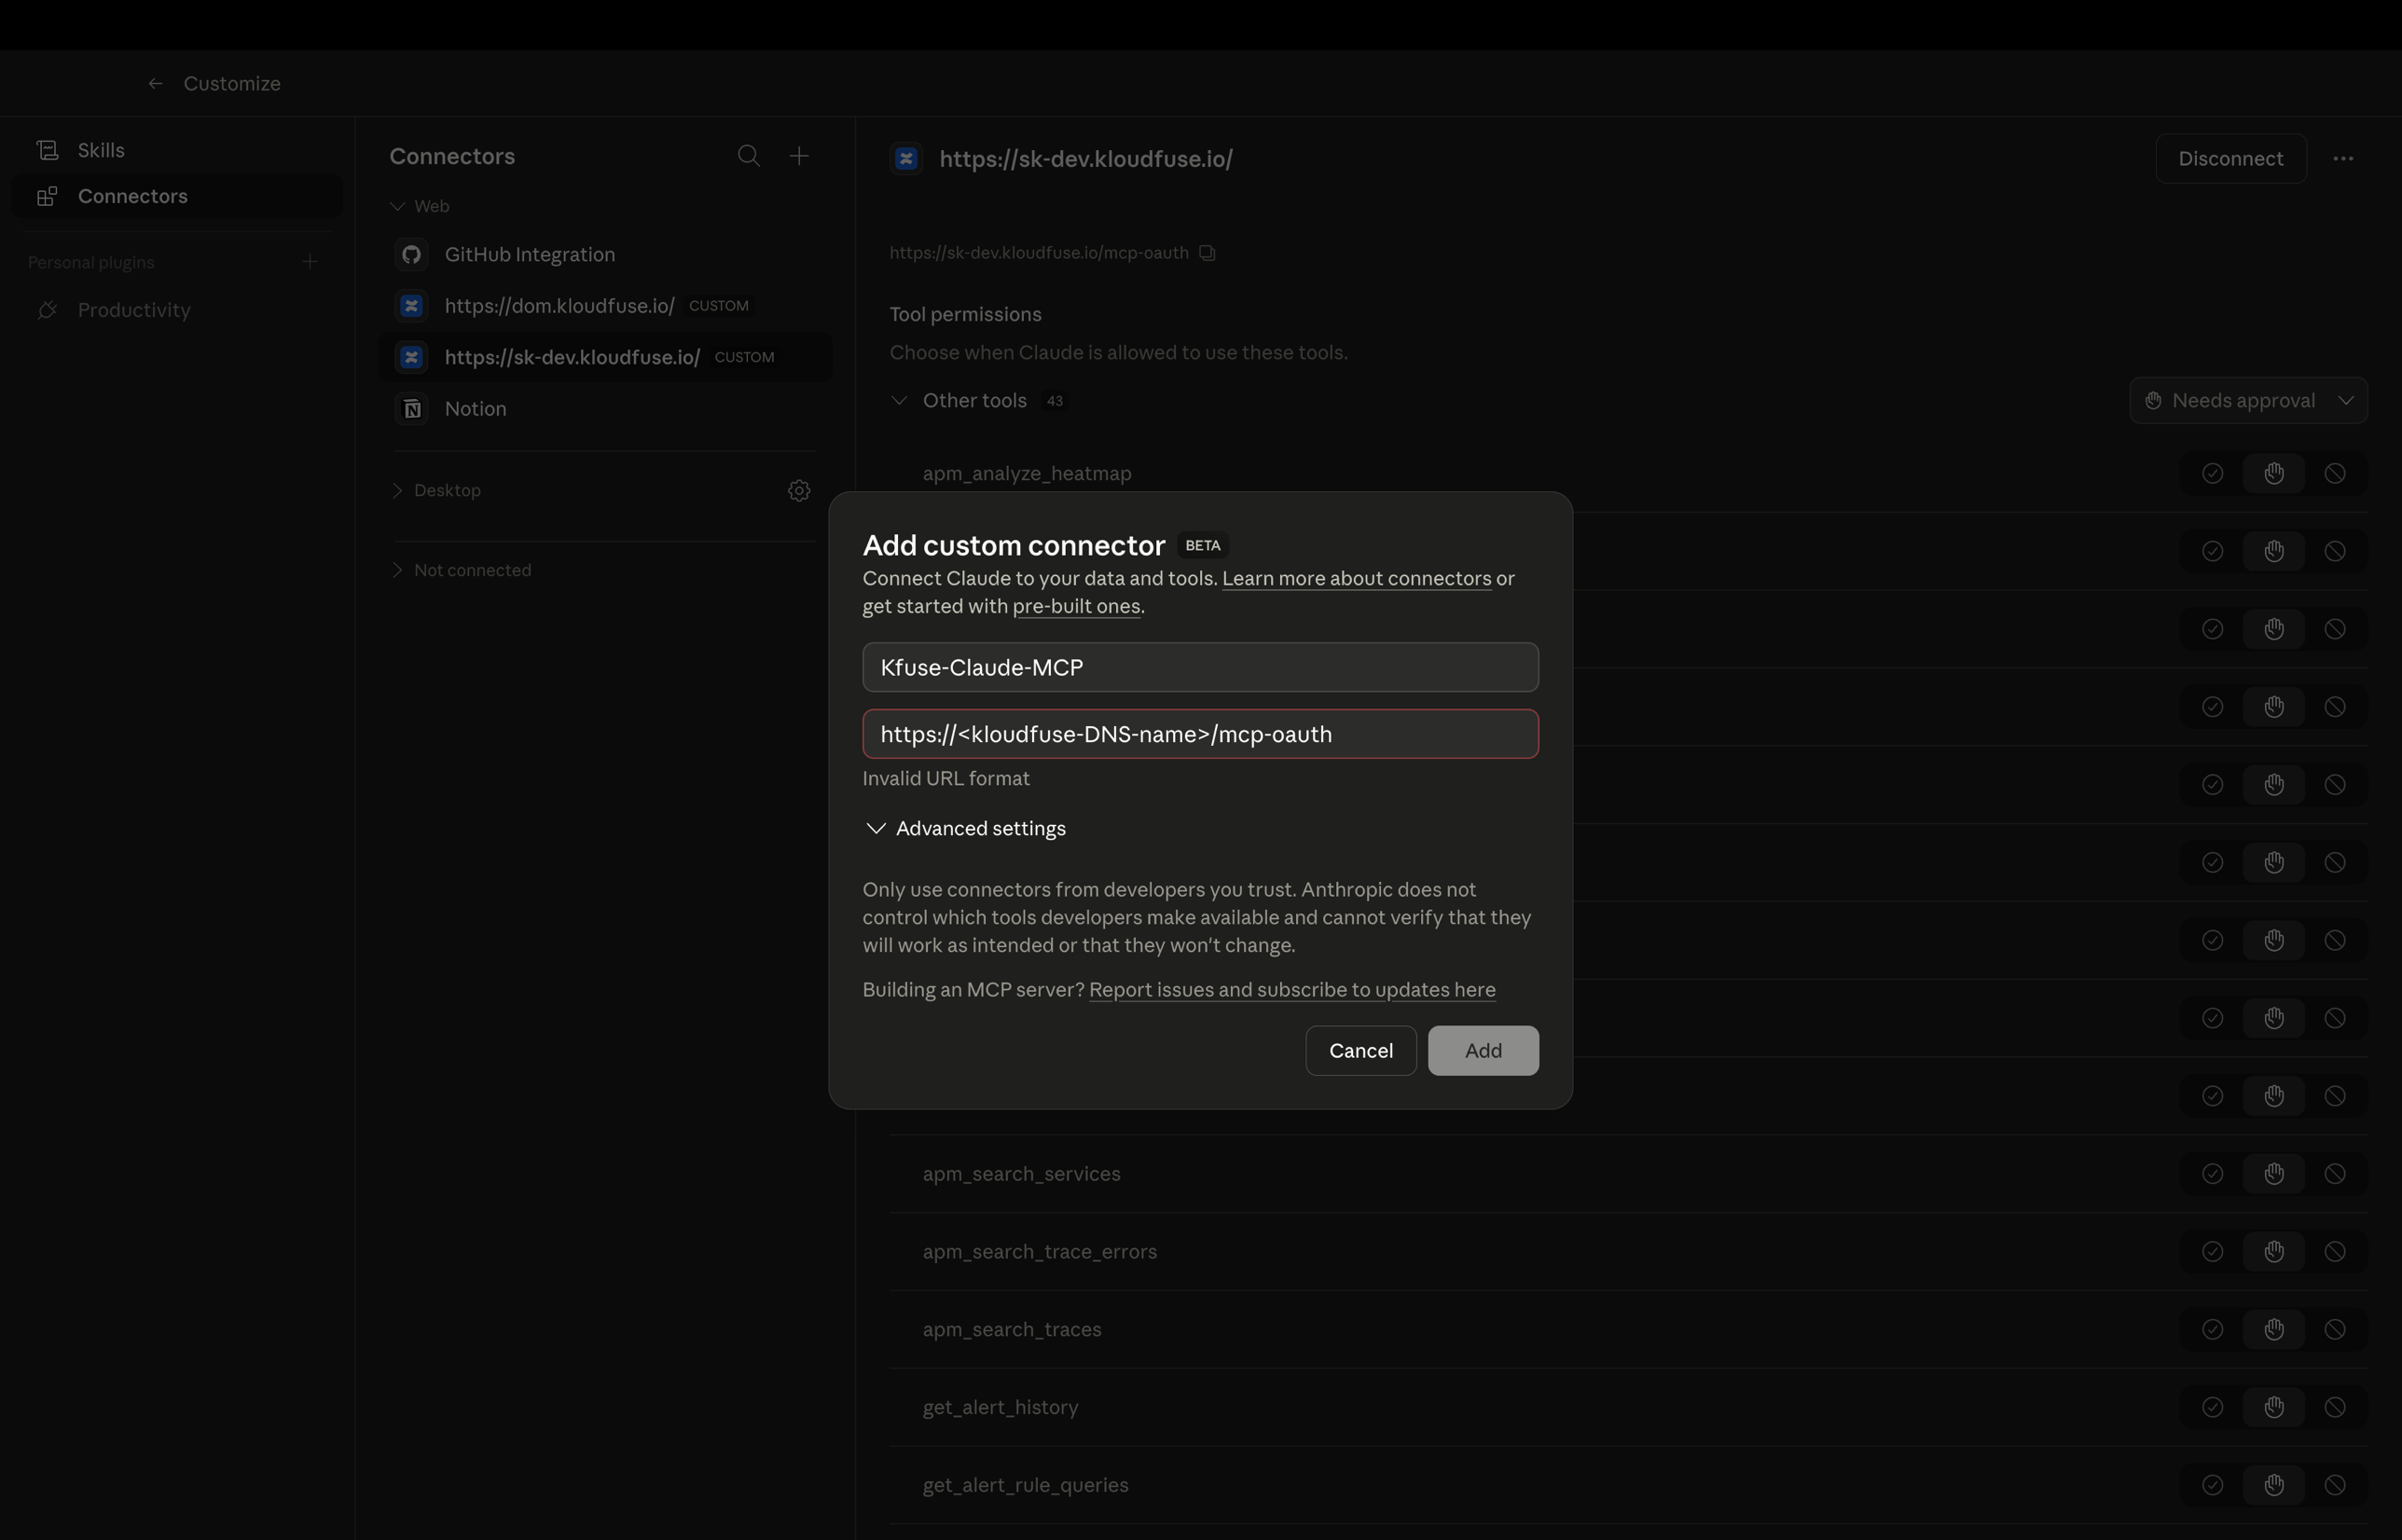
Open Claude Desktop, click your profile icon, and choose Settings → Customize → Connectors.
-
In the Connectors pane, click the + icon (top-right of the connectors list) to open the Add custom connector dialog:
-
Fill in the fields:
Field Value Name
Any friendly label, e.g.
Kloudfuse(shown in the Connectors list)URL
https://<KLOUDFUSE_URL>/mcp(replace with your cluster URL)Advanced settings
Leave collapsed — Kloudfuse does not need custom headers or OAuth overrides
-
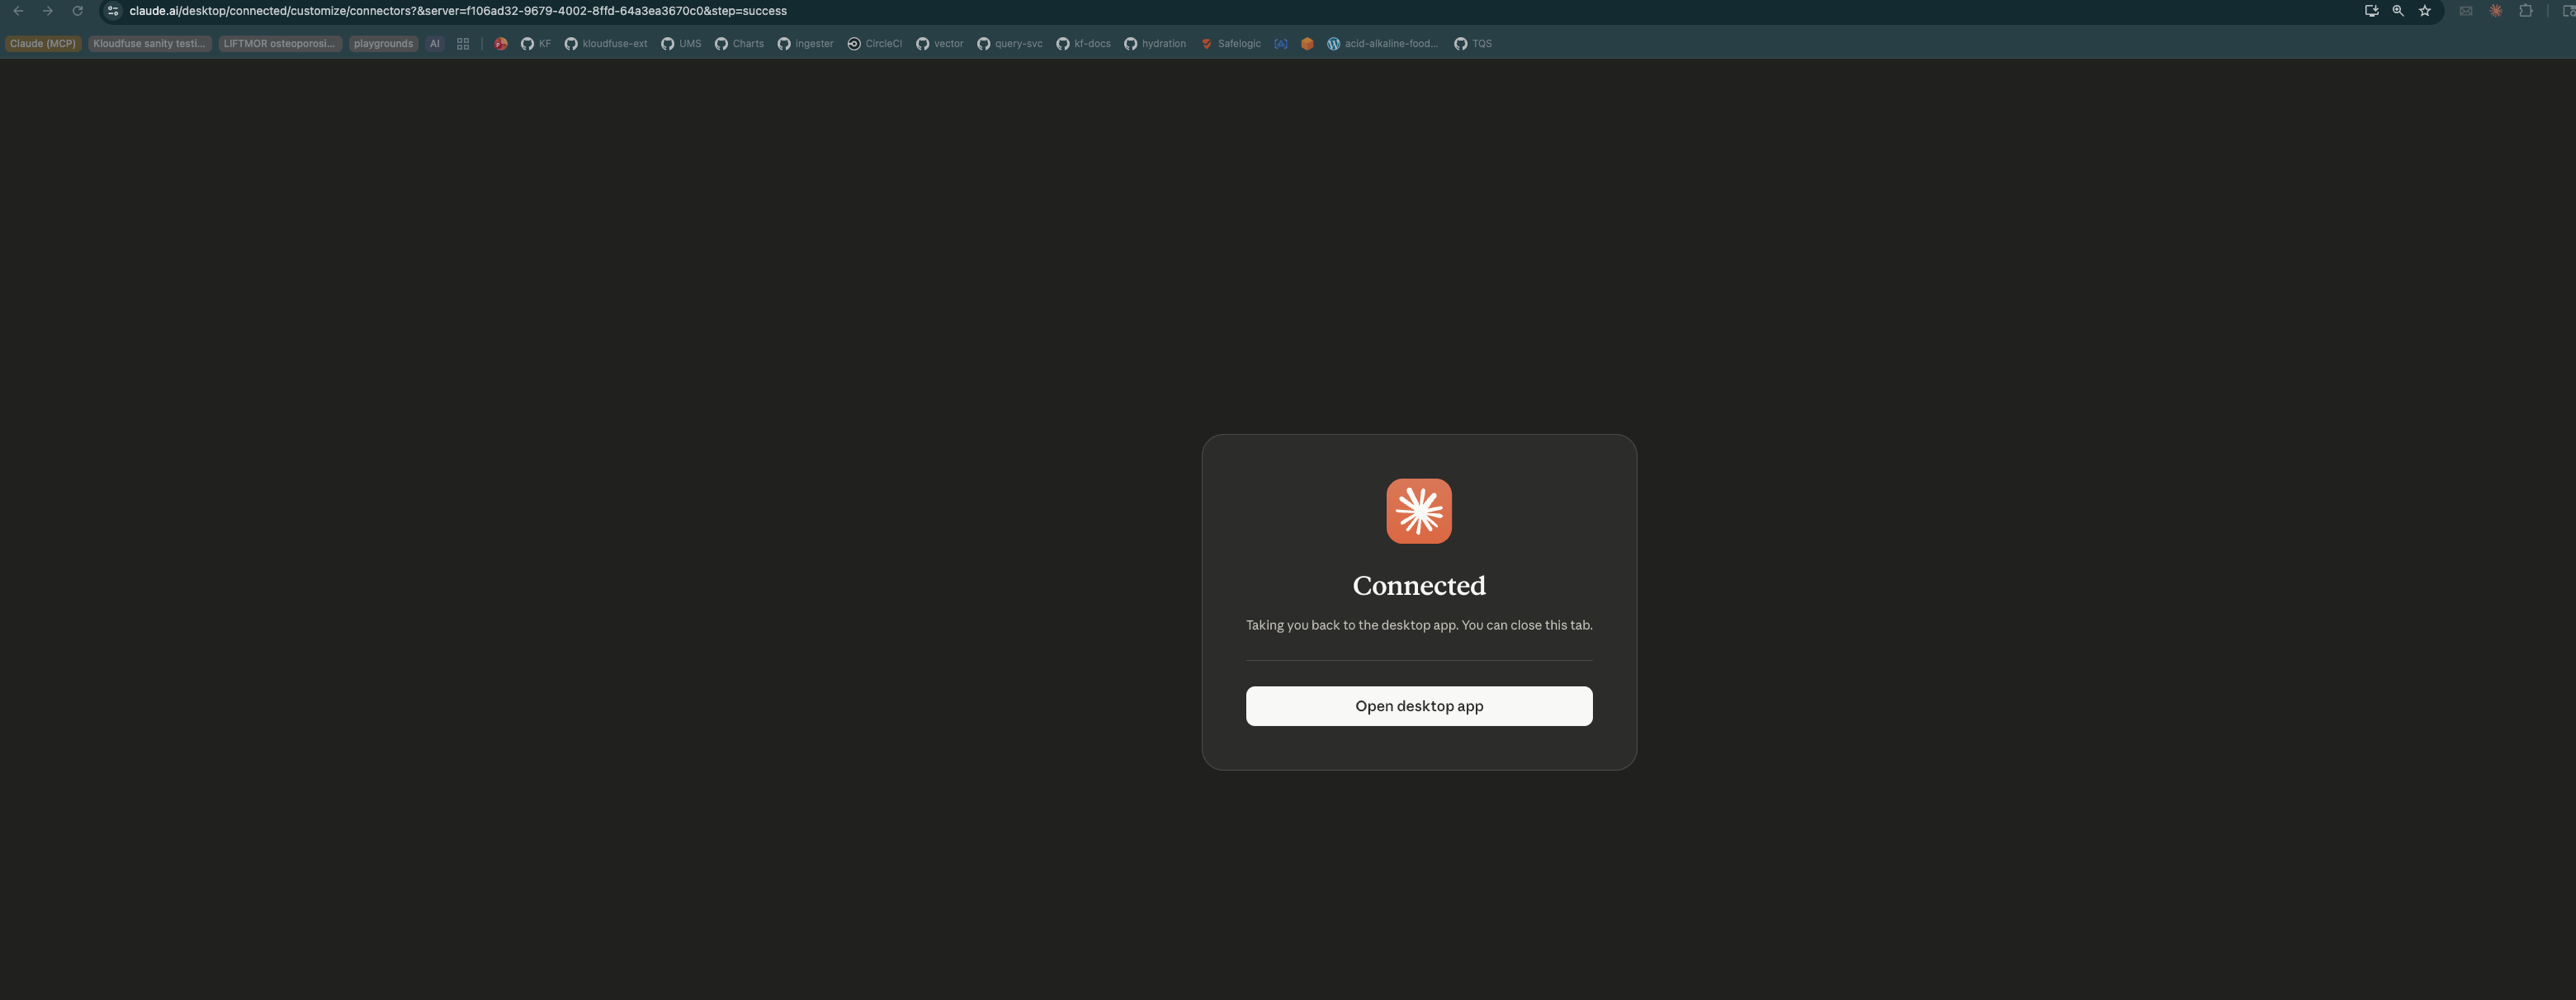
Click Add. Claude opens a browser window to your Kloudfuse SSO sign-in page.
-
Sign in with your corporate identity (Okta, Azure AD, Google, SAML). On success the browser shows a Connected page and Claude Desktop lists the Kloudfuse tools under the new connector.
If the Add button returns an Invalid URL format error, double-check that the URL starts with https:// and ends with /mcp (not a bare cluster URL). If it returns start_error after you sign in, the cluster hasn’t been set up yet — see Enable on the Cluster.
|
Manage the Connector In-App
From Settings → Connectors → (the name you gave the connector, e.g. Kloudfuse):
-
Toggle the connector on or off for a chat without re-authenticating.
-
Expand the Tools list and disable individual tools (for example, turn off write operations) — Claude won’t invoke disabled tools.
-
Disconnect removes the connector’s stored credentials from this Claude Desktop install.
-
Reconnect re-runs the SSO flow — use this after switching user accounts or if a token expires and Claude starts returning 401s.
| Tool toggles are per-installation. If you use Claude Desktop on multiple machines, set them per machine. |
